Generate Quick Purchase Order (PO)
*Note: The Parts & POs feature is available to Asset Essentials clients for an additional cost. Please contact your Sales Representative or Client Services if you are interested in purchasing this feature.
The Generate Quick Purchase Order (PO) process is an easy and quick way to procure Parts from the INVENTORY - List By Location. Use the List By Location to view parts at different storage locations. Apply the Needs Replenished filter to find items that need reordering and procure them by using Generate Quick PO.
Generating PO
-
Login to Asset Essentials.
-
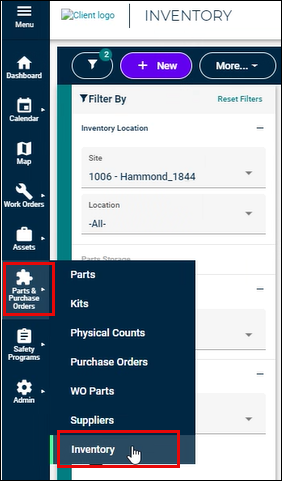
Click on Parts & Purchase Orders, select Inventory.
-
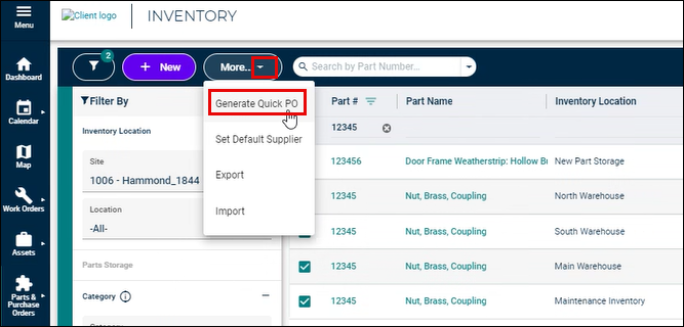
Select the location from the Site drop-down menu and choose the purchase items from the list.

-
Click More, select Generate Quick PO.
-
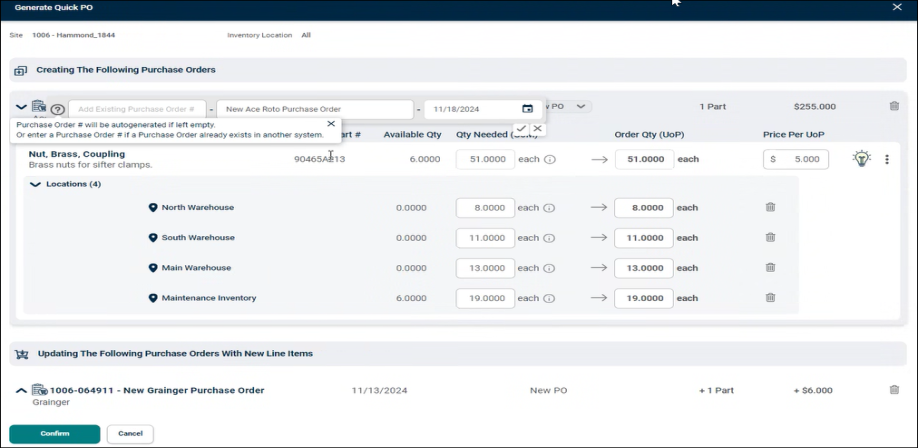
The Generate Quick PO screen appears suggesting parts to add to a new or existing PO.
-
If a PO with Created status category exists for the supplier as Parts Default Supplier, the system recommends adding the part as a line item to that PO, saving time and simplifying the process. This is shown in the Updating The Following Purchase Orders With New Line Items.

-
If a PO with Created status category does not exist, a new PO is recommended for the part using the Parts Default Supplier. This is shown in the Creating The Following Purchase Orders.
-
The default created PO…
-
Title is “New {supplier name} Purchase Order”
-
Originated date is the current date
-
Status is initial status

-
-
The system pre-fills PO and part details; however, there is a customization option also available if needed.
-
The PO details are editable only for new POs.
-
The Part details can be updated for both new and existing POs.
-
NOTES:
-
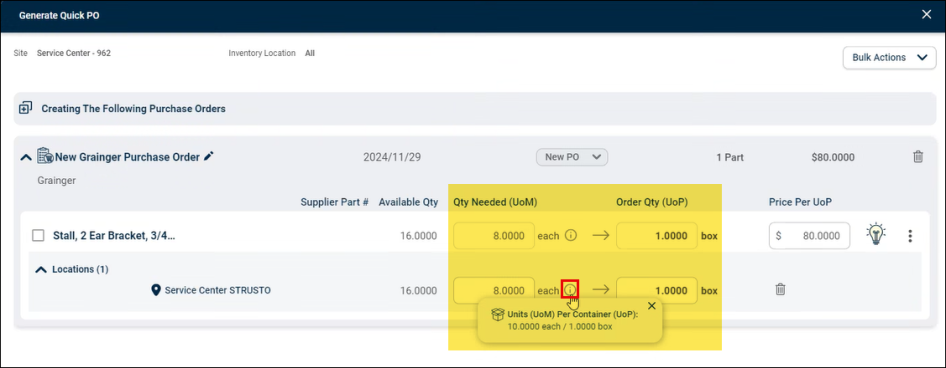
Qty Needed (UoM): The Units of Measure (UoM) is a standard way an inventory item is measured when stored or used on Work Orders. This is defined at the inventory item level, meaning each part can only have one UoM.
-
Order Qty (UoP): The Units of Purchase (UoP) is a standard way an inventory item is purchased from a supplier. This is defined at the supplier level, allowing different suppliers to use different UoPs for the same inventory item.
-
Scenario Example: When buying a case of bracket, the UoP is a case; however, the UoM for inventory purposes is each bracket (i.e., 10 brackets per case).
-
Both the UoM and UoP are editable. Changing the UoM updates the UoP based on the supplier's conversion. To view the conversion, click on the info icon besides the UoM. This conversion is one-way, as indicated by the arrow from UoM to UoP.
-
-
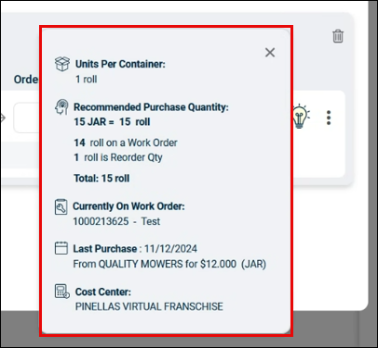
Clicking on the Bulb icon provides additional detail about the Part which helps to make informed decisions and create optimal POs. The Recommended Purchase Quantity includes the quantity need for a Part and any Part quantity marked as Order in the Work Order.

-
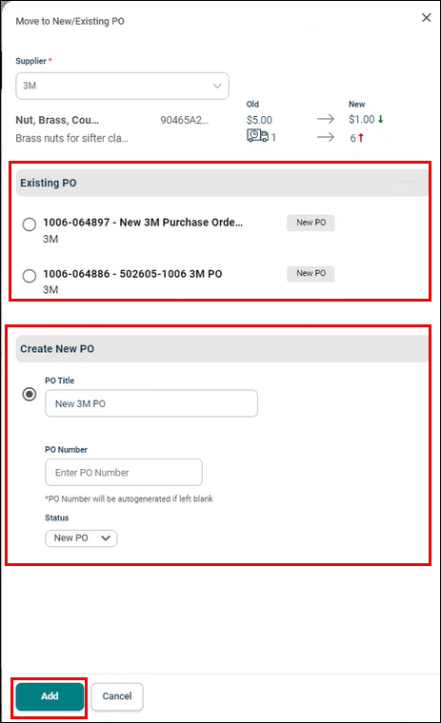
The Supplier of a Part can also be updated using the Move to New/Existing PO option. The system even recommends the supplier based on cost and delivery speed wherever possible

-
Once the supplier is selected, the changes in price and lead time can be seen with up and down arrows.

-
If POs exist for the supplier, select the existing PO or create new PO.
-
If no POs exists, create new PO with the selected supplier.
-
Click Add to reflect the changes on the Generate Quick PO screen.
-
Click Confirm to finalize the PO creation or update process.

-
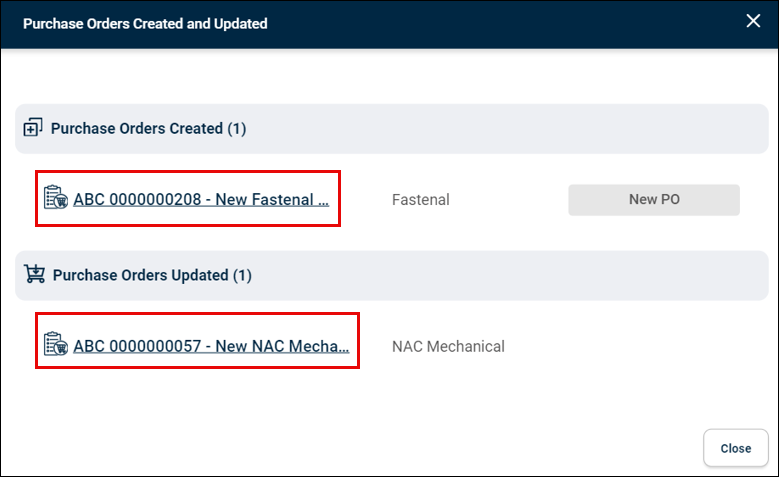
The Purchase Orders Created and Updated screen appears showing the newly created or modified POs. Clicking on the PO # or title will open the specific PO in a new tab for further review or editing.
-
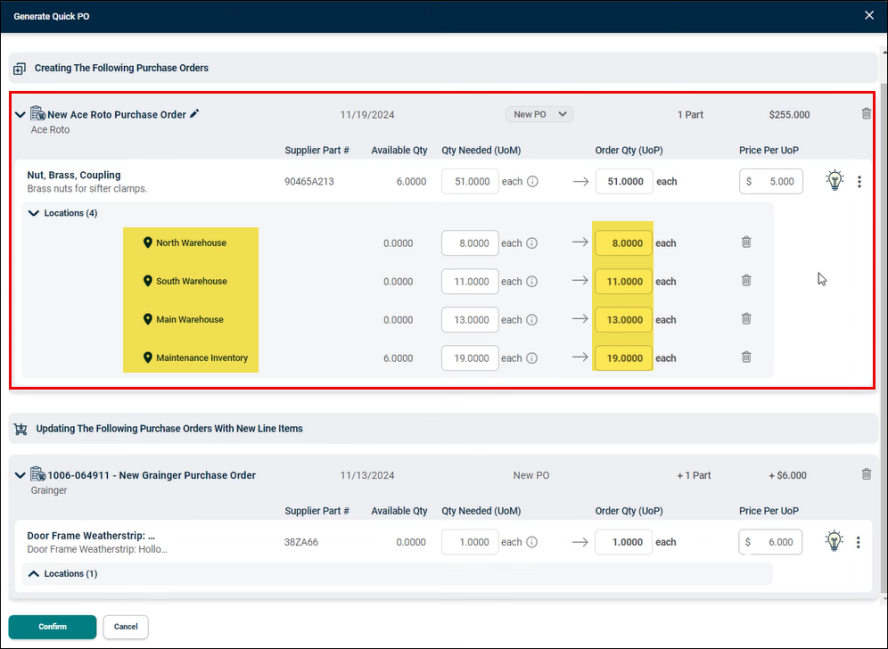
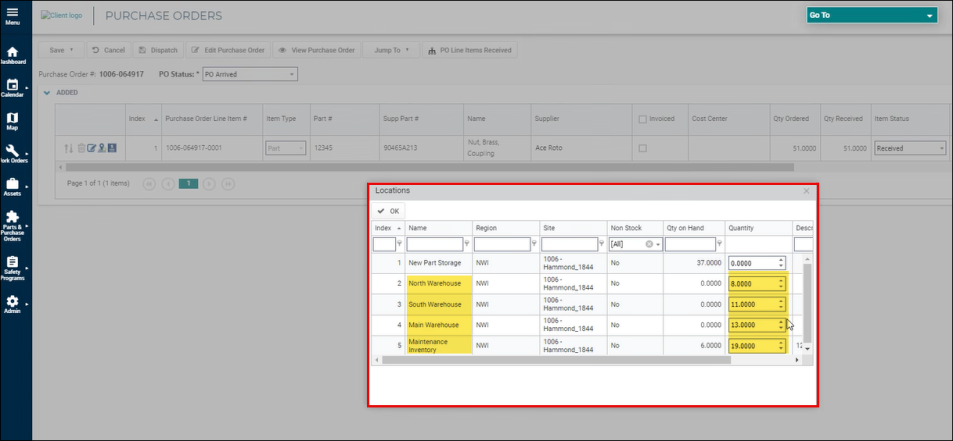
The Generate Quick PO process records the intended location for each part. When parts are received, the system makes sure they are stored in the appropriate locations with the same quantities as ordered.Note: The system will only store the location and quantity record if PO is generated using Generate Quick PO process.
-
Examples:
-
Creating PO with multiple locations and quantities.
-
-
PO Arrived in all the locations with same quantity as requested.
Deleting PO, Part, and Location
This functionality enables the removal of parts individually or in bulk, along with their associated locations and purchase orders.
Bulk Delete - Parts
The below steps provide instructions in deleting Parts.
-
Select multiple parts.
-
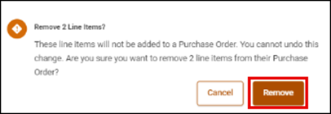
Click Bulk Actions drop-down arrow, select Remove Line Items.

-
The following screen appears, click Remove.
-
A success notification message appears on the top right corner.

Single Delete
Deleting Part
The below steps provide instructions in removing Part.
-
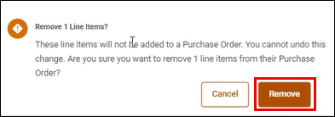
Click on the ellipses (3 dots), select Remove Line Item.

-
The following screen appears, click Remove.
-
A success notification message appears on the top right corner

Deleting PO
The below steps provide instructions in removing PO.
-
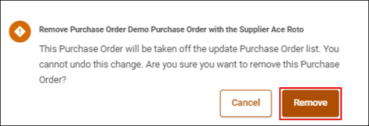
Click on the Bin icon.

-
The following screen appears, click Remove.
-
A success notification message appears on the top right corner.

Deleting Location
The below steps provide instructions in removing location.
-
Click on the Bin icon.

-
The following screen appears, click Remove.

-
A success notification message appears on the top right corner.

